How to Change A Radiator Valve
How to Change a Radiator Valve Easily in 8 Simple Steps
Because it keeps you and your family warm throughout the winter, your radiator is your best friend. But there are a few good reasons to think about changing your radiator valves. The list goes on and on, from outdated upgrades to malfunctioning parts. More importantly, during a cold snap, your valves may occasionally break. Thus, it's a good idea to know how to quickly and simply change a radiator valve in a few easy steps in case that happens.
Why and When Do You Have to Change Your Radiator Valve?
First of all, it's possible that your radiator valve needs to be replaced right away if it's broken. Additionally, think about switching to a thermostatic radiator valve (TRV) from your manual valve. You're in luck if you're ready to switch to TRV because these units are reliable, long-lasting, and capable of regulating the temperature in your house to make it more comfortable. And lastly, there are artistic components. It is important that your radiator valve blends in with the design of your house. Whenever you replace your valves, don't forget to first get advice from nearby radiator installers if you're not very skilled at do-it-yourself projects.
How Do Thermostatic Radiator Valves Work?
A radiator is equipped with a self-regulating valve, or TRV. It "senses" the room's temperature and modifies the radiator appropriately. A unique valve in the TRV contracts in response to temperature changes, allowing more hot water to enter and heat the space if it feels chilly. Meanwhile, the valve will expand to permit a reduced flow of hot water in the event that the room's exterior temperature is warm. The radiator will gradually cool down as a result. These are just some of the advantages of using a thermostatic radiator valve.
What Tools and Items You May Need
As you are changing your radiator valves or swapping out a manual valve for a new TRV, make sure you have all the tools and equipment you'll need. For you, we've put together a brief list:
- New TRV valve
- Adjustable spanner/pliers
- Radiator bleed key
- Wrench
- Hose
- PTFE tape
- A jubilee clip
- Wire wool
- A dry cloth/towels/old sheets
How to Replace a Radiator Valve
Since hot water is usually used to operate radiators, shut off both your water supply and your heating system to prevent accidents and property damage. You can change your radiator valve by following these 8 steps:
Step 1. Turn Off Your Heating System and Your Water Supply
All thermal systems must be turned off. Remove the cap that covers the return valve and locate some pliers or an adjustable spanner. Till the shaft stops turning, turn it clockwise with the tool. This stops any water from getting inside the appliance. At that point, manually turn the radiator's opposite-side valve clockwise. Turn a thermostatic valve clockwise until the number on it becomes zero.
By doing this, you can make sure that the thermostat in your radiator doesn't detect outside temperatures and attempt to change the water's heat in response. When your TRV activates while the system is dry, it may injure it and eventually result in The boiler is overheating.
Step 2. Prepare Your Home and Make Your Radiator Valves Ready
Assemble all necessary tools, such as the replacement valve, and prepare to drain and bleed your radiator of any remaining water. To absorb any leaky water, place some old sheets or towels on the floor near the radiator.
Remember to remove the two units' heads by hand when swapping out an old TRV for a new one. After taking off the new valve's nuts and connectors, coat the sections that connect to the radiator. Just in case, use the PTFE tape and wrap it around several times in a clockwise direction.
Step 3. Bleed Your Radiator and Drain Out Any Water
Here's where the hose becomes useful. To drain any water and bleed your radiator, connect it to the drain cock and run the hose outside. Once connected, the radiator's water can be efficiently released. Make sure the radiator is full of air by using your radiator bleed key to bleed it. This should take place over the course of about fifteen minutes.
Step 4. How to Remove The Old Valve
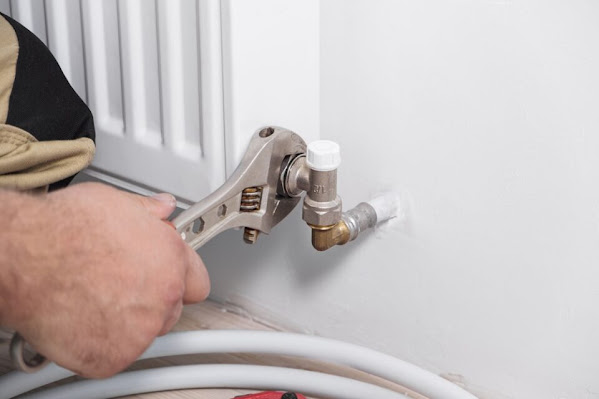
Remove the radiator valve by unscrewing the cap. If you're unsure of how to proceed, adhere to these instructions: First, after draining and bleeding your radiator, place some dry towels, sheets, or cloths under the valve to catch any dripping water that might be left over. Next, use an adjustable spanner to loosen the nuts on the old valve while holding its body in place with a wrench. Remove the valve body from the radiator by unscrewing the cap nuts. To remove any extra gunk that may have accumulated on it, use wire wool.
Step 5. How to Fit Your New Radiator Valve
It's actually not that hard to install thermostatic or radiator valves. Make sure the new valve is positioned correctly. Attach the new valve by aligning the sealing components and valve cap-nut over the pipe's end, being cautious not to tighten the cap-nut too soon. After lining up the valve with the adaptor with your wrench, tighten the cap nut that connects them. Make sure the cap-nut holding the valve to the water pipe is tightened now. The TRV may be manually fitted onto the valve. You can move on to the next step after you've finished those.
Step 6. Turn On Your Water Supply and Bleed the Radiator Once More
After your new radiator valve was successfully installed, you can now enjoy a more aesthetically pleasing and, depending on your preferences, warmer or colder home. It is now necessary for you to turn on your water supply and perform another radiator bleed. This step is essential because it allows for the release of all trapped air and improves the smoothness and flow of water within the radiator. To finish this step, adhere to the instructions provided in Step 3 above. In addition, you'll need to refill your system with water, which will require turning on the water and heating that you had previously turned off.
Step 7. Re-pressurise Your System and Check For Faults
Repressurizing your entire system is necessary, as is double-checking it for any issues. Repressurizing your boiler can be done in three main ways, and despite how difficult it may seem, most do-it-yourselfers can complete the job without any issues. These could be leaks, poor temperature control, or other associated problems.
Step 8. Clean When Your Job is Done
Even though you just finished changing your radiator valve, your work isn't finished until all of your tools are put away. After wiping up any spills and drips, the entire area is tidy and orderly, just as it was before. Now, tidy up the area surrounding the radiator and prepare to enjoy the results of your labour!


Comments
Post a Comment